Home Assistant Integration
Where is my Home Assistant Container config folder?
If you're setting up Home Assistant Container, the Docker command you need to run in order to establish a config folder for Home Assistant is specific, in addition to being specific to your operating system. You need the config folder in order to be able to edit the Home Assistant configuration.yaml file, which is required for setting up a lot of integrations in Home Assistant.
The first thing we need to do is create a configuration folder for Home Assistant.
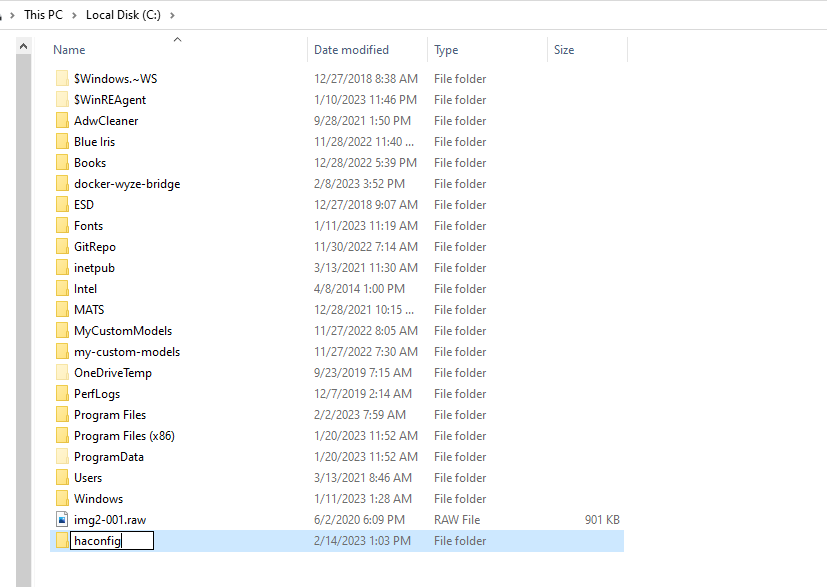
The configuration folder will be on whatever drive you run the Docker pull on, which in my case, is the _C:_ drive. So open Windows Explorer, go to the _C:_ drive, right-click in the folder area, and go to New -> Folder. Input the folder name you want. This examples calls the folder "haconfig".
Now go to the Start button for Windows and type "CMD" and open Command Prompt. Then type
docker run -d --name homeassistant --privileged --restart=unless-stopped -e TZ=America/Edmonton -v c:\haconfig:/config -p 8123:8123 homeassistant/home-assistant:latest
where --name homeassistant is the name of your container, TZ=America/Edmonton is the time zone for Home Assistant (just enter your own time zone here), and -v c:\haconfig:/config is the path of the config folder (if you created a folder in C:\Users\Joseph\haconfig this would be -v C:\Users\Joseph\haconfig:/config).
balena Etcher Error - Attention Something Went Wrong
If you're using balena Etcher to set up Home Assistant OS, you might be trying to use Flash from URL. For most people, this should work. But some might get an error:
Attention. Something went wrong. if it is a compressed image, please check that the archive is no corrupted. Command failed: cmd /c "C:\Users\AppData\Local\Temp\etcher\balena-etcher-electron-78afb6aee66.cmd"
Try downloading the first image instead of pointing to the Git URL.
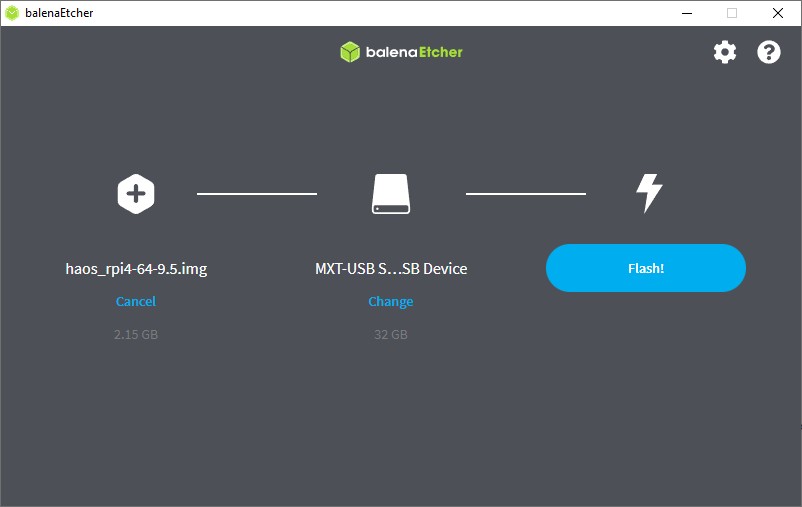
Take the URL https://github.com/home-assistant/operating-system/releases/download/10.0/haos_rpi4-64-10.0.img.xz and put it into a browser window. It automatically downloads. Go back to balena Etcher. Only this time, select Flash from a file instead of from a URL. Select the haos_rpi4-64-10.0.img.xz that downloads automatically.
socket.gaierror: [Errno -2] Name does not resolve
If you're setting up CodeProject.AI Server on a different machine than Home Assistant (for example, on Windows), when you call CodeProject.AI Server, it might not be able to be reached. Here is the error in the Home Assistant logs, home-assistant.log, which can be found from File Editor in the left navigation pane by clicking the Browse Filesystem button.
 File "/usr/local/lib/python3.10/site-packages/requests/adapters.py", line 565, in send
    raise ConnectionError(e, request=request)
requests.exceptions.ConnectionError: HTTPConnectionPool(host='http', port=80): Max retries exceeded with url: //10.0.0:32168/v1/vision/detection (Caused by NewConnectionError('<urllib3.connection.HTTPConnection object at 0x7f9fd21990>: Failed to establish a new connection: [Errno -2] Name does not resolve'))
From the Windows Start button, select Settings. Then select Update and Security. Then select Windows Security from the left navigation pane and click the Open Windows Security button. Then select Firewall and nework protection from the left navigation pane, then Advanced Settings. Click Yes to allow the app to make changes. Now click Inbound Rules.
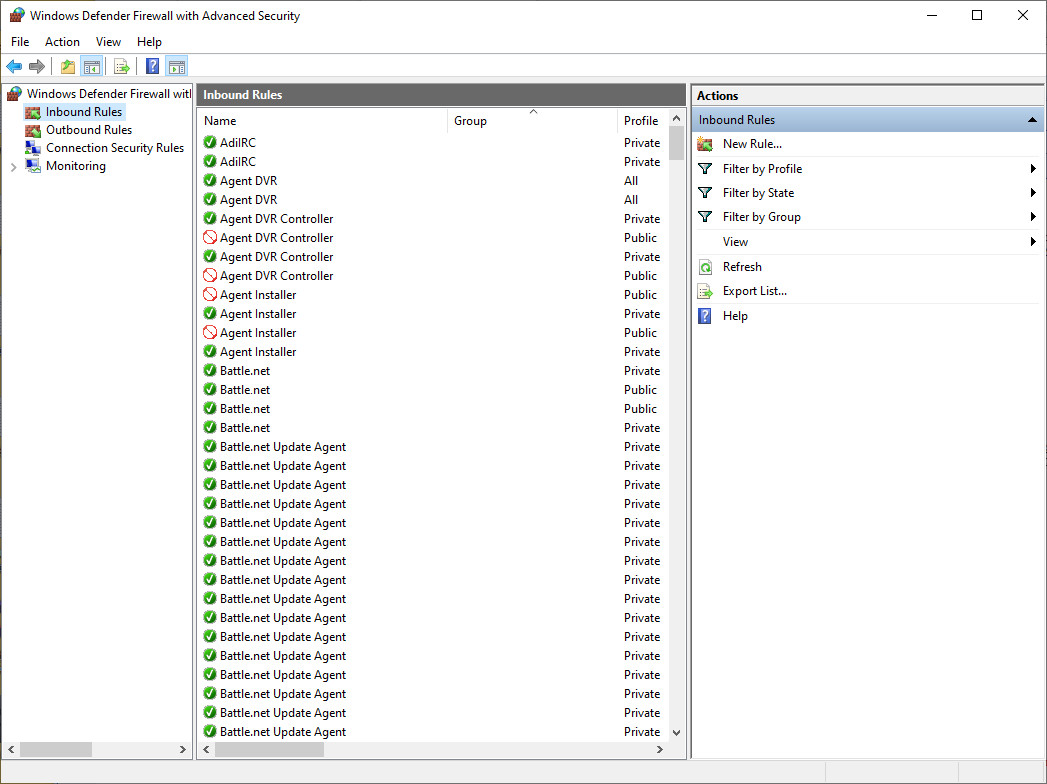
From here, click New Rule....
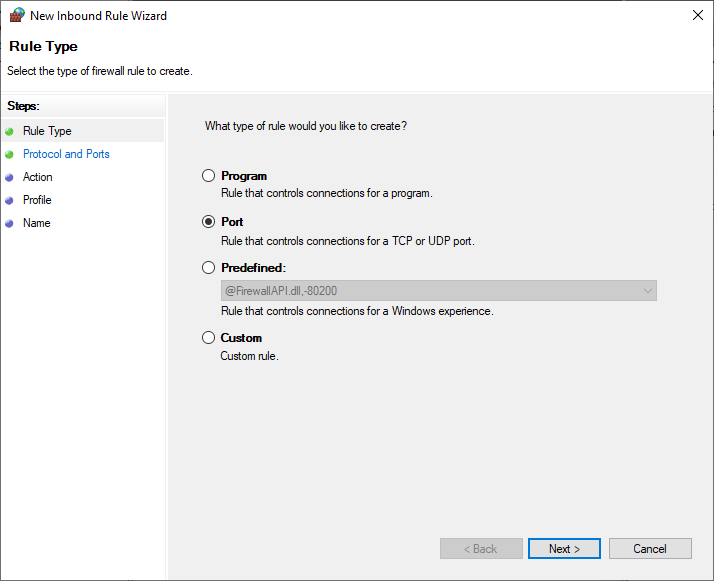
We want to create a rule for port 32168, so select Port then hit Next.
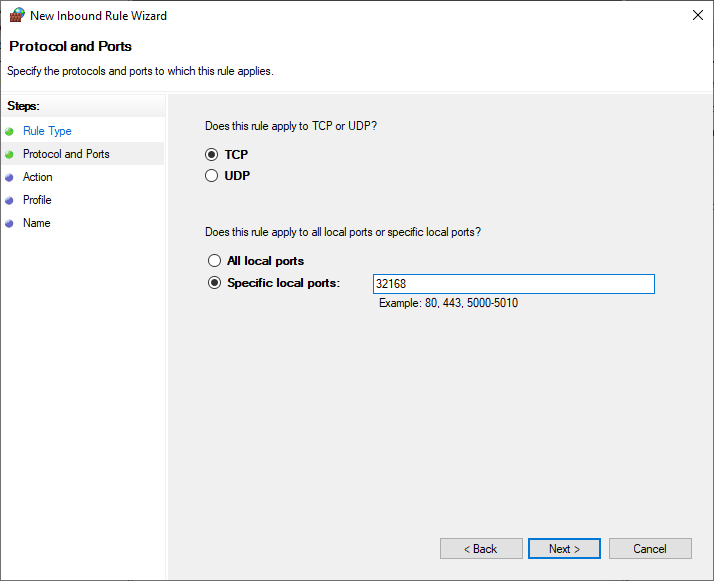
Make sure TCP is selected, then in Specific local ports type "32168" and hit Next.
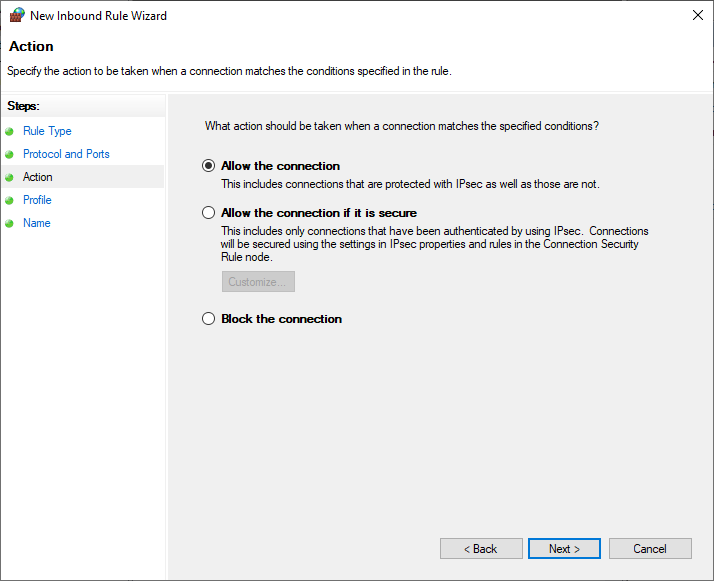
The default selection is Allow the connection which is correct. Hit Next.
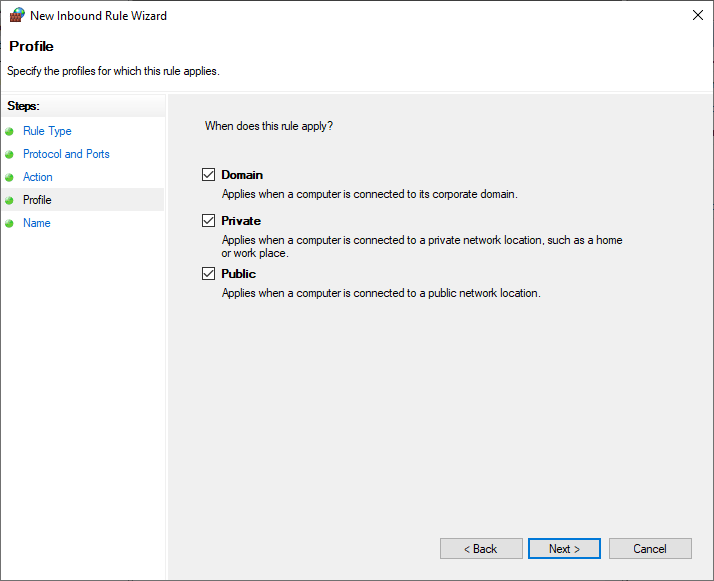
Check all these boxes and hit Next.
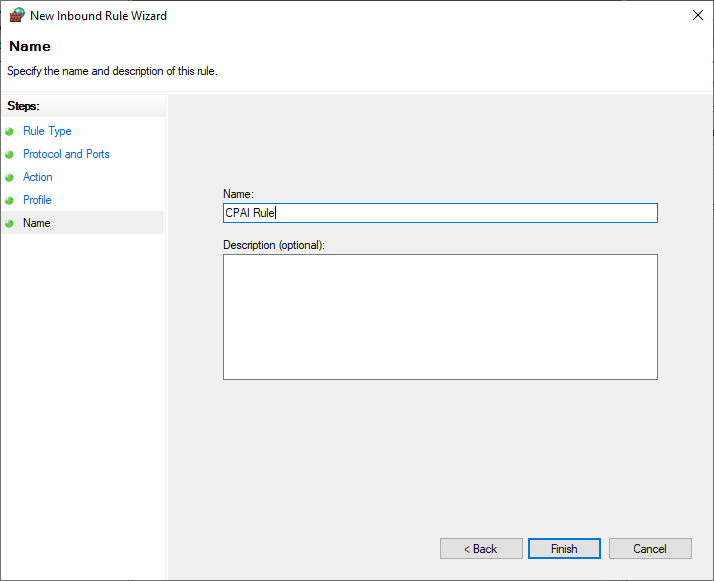
You can name the rule whatever you want. Probably best to name it something you'll recognize later. Hit Finish. Now CodeProject.AI Server can be called from Home Assistant OS on my Raspberry Pi 4.