Adding your own .NET module: Portrait Filter
Introduction
This article will show how to create a Module in .NET for the CodeProject.AI Server by adapting existing code and adding an adapter so that the functionality of the original code is exposed as an HTTP endpoint by the CodeProject.AI Server. The process is similar to Adding your own Python module to CodeProject.AI, except we'll be using .NET instead pf Python and go a little deeper into some of the gotchas you may encounter.
Again: ensure you've read [Adding new modules to CodeProject.AI](adding_new_modules.md] before you start.
Choosing a module
You can write your own module from scratch, or use one of the large number of Open Source AI projects currently available. There are thousands out there and for this article I chose the Portrait Mode project on GitHub written by Valery Asiryan. This project takes an image as an input, detects the people in it, and blurs the background behind them. The result is returned as an image. An easy way to up your selfie game.
An example of the Portrait Mode in action from the GitHub repository with the original (left) and result (right)


Writing the Module
This tutorial assumes that you have already cloned the CodeProject.AI repository from GitHub. This is located at https://github.com/codeproject/CodeProject.AI-Server.
To get the code we are going to include in our module, clone the Portrait Mode project on from GitHub to a directory of your choice.
Review the Repository Code
Looking at the code, we see that the project consists of a Windows Form, Form1.cs, and the code to perform the background blurring. For our purposes, we do not need the Form. All we need are the 3 files located in the cscharp\Lib directory and the ONNX model file located in the deeplabv3_mnv2_pascal_train_aug_2018_01_29 directory
Create a new Module Project
When you write a CodeProject.AI Module in NET 7, you are creating something that polls the CodeProject.AI
Server for commands from a queue created for the module. The easiest way to do this is to create a
Worker Service project in a folder under the src/modules. The CodeProject.AI Server scans
the directories in this folder for Module metadata which allows the server to start the Modules.
The steps to do this are:
-
Right click on the src/modules folder in the Solution Explorer
- Select
Add->New Project - Select the Worker Service project template for C#
- Click
Next
- Select
-
This will open the
Project Configurationdialog
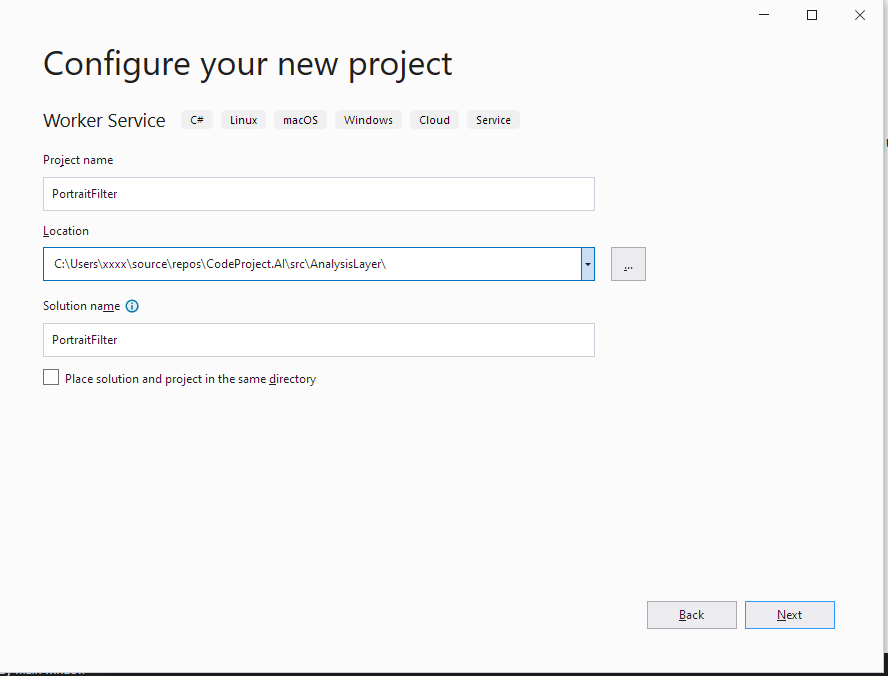
- Set the
Project Nameto PortrailFilter - Set the
Locationto the src\modules directory in your copy of the CodeProject.AI solution. - click
Next.
- Set the
-
This will open the
Additional Informationdialog
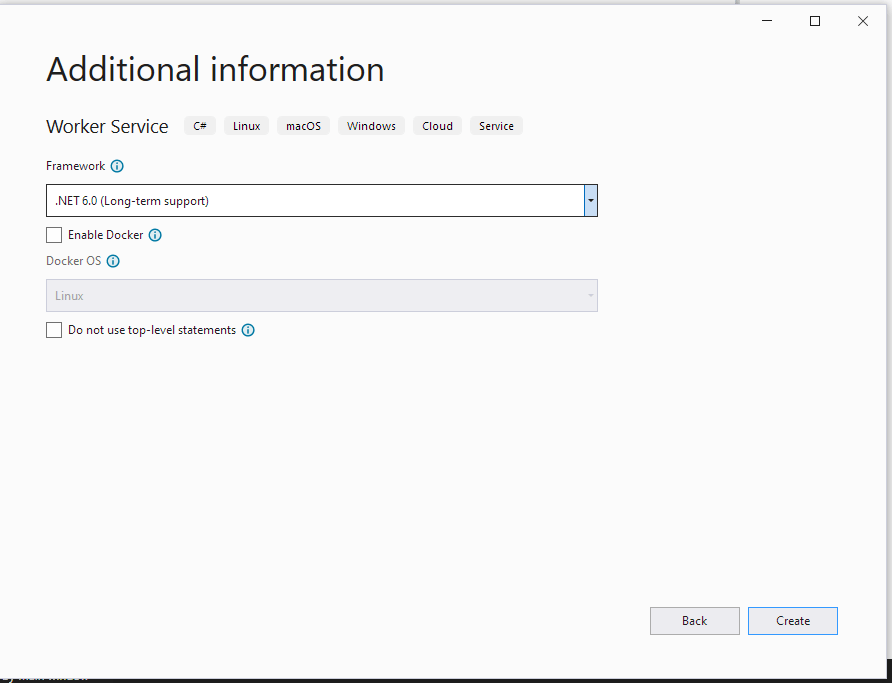
- We don't need to change anything here, so click
Create.
- We don't need to change anything here, so click
-
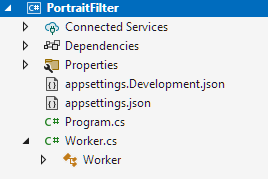
This will create the project with the following structure
Copy Code from the Repository
Since we only need the library code from the original Portrait Mode repo, we will create a folder called Lib to hold this code.
- Right click on the PortraitFilter project
- Select Add -> New Folder
- Name the folder Lib.
- Copy the relevant code from the Portrait Mode repo.
- Right click on the Lib folder
- Select Add -> Existing Item
- Navigate to you copy of the Portrait Mode repo and the csharp\Lib directory
- Select all the files and click Add to copy the code into the new project
- Copy the AI model from the Portrait Mode repo.
- Right click on the Lib folder
- Select Add -> Existing Item
- Navigate to you copy of the Portrait Mode repo and the deeplabv3_mnv2_pascal_train_aug_2018_01_29 directory
- Select All Files in the file filter at the bottom right
- Select the .onnx file and click Add to copy the modle into the new project
Add the required NuGet packages
If you were to build the project now, you would get a bunch of errors about missing types or namespaces. This is due to missing NuGet packages used by the code we just copied into the project. This is solved by:
- Right click on the
PortraitFilterproject and selectManage NuGet Packages.... This will open a window where you can, as it says, manage your NuGet packages. - Add the following packages
Microsoft.ML.OnnxRuntimefor running theONNXmodelUMapX- for performing operations on the images.
- Building now will result in error complaining about compiling unsafe code. To allow this
- Right click on the
Portrait Filterproject and selectProperties. - Check the
Allow code that uses the unsafe keyword to compile.
- Right click on the
- Building now will result in a
'Maths' does not contain a definition for 'Double'error. This is due to changes inUMapXfrom the version thePortrait Moderepo used and the current version. Correct this by changing the changing the type ofStrengthfromDoubletoFloatin thePortraitModeFilter.csfile in theLibdirectory. - change the type of the
_strengthfield tofloaton line 17 - change the type of the
strengthparameter tofloaton line 25 - change the type of the Strength property to float on line 35
- change the call to
Maths.DoubletoMaths.Floaton line 43. This is the UMapX change in the its API the required these changes.
using System.Drawing;
using UMapx.Core;
using UMapx.Imaging;

namespace CodeProject.AI.Modules.PortraitFilter
{
    /// <summary>
    /// Defines "portrait mode" filter.
    /// </summary>
    public class PortraitModeFilter
    {
        #region Private data
        BoxBlur _boxBlur;
        AlphaChannelFilter _alphaChannelFilter;
        Merge _merge;
        float _strength;
        #endregion

        #region Class components
        /// <summary>
        /// Initializes "portrait mode" filter.
        /// </summary>
        /// <param name="strength">Strength</param>
        public PortraitModeFilter(float strength)
        {
            _boxBlur = new BoxBlur();
            _alphaChannelFilter = new AlphaChannelFilter();
            _merge = new Merge(0, 0, 255);
            _strength = strength;
        }
        /// <summary>
        /// Gets or sets strength.
        /// </summary>
        public float Strength
        {
            get
            {
                return _strength;
            }
            set
            {
                _strength = Maths.Float(value);
            }
        }
        ...
Building now should result in no errors.
Create the modulesettings.json file
To provide the CodeProject.AI Server with enough information to launch and service our module we need to create the modulesettings.json file. This will define the name of the module, how to start it, what queue to setup and process, and the routes that should be watched for requests to this module.
Our runtime will be .NET, and we'll set our queue name as portraitfilter_queue. The route for
this module will be /v1/image/portraitfilter, and will have two inputs, a File with an named
"image", and Float value with a named "strength". There will be two outputs, a Boolean value named "success", and the resulting image File named "filtered_image".
Below is the contents of our modulesettings.json file. Note that we're only supporting Windows
for this module due to issues with the Onnx and drawing libraries we're using. Portint to Linux and
macOS is an exercise for the reader.
{
  "Modules": {
    "PortraitFilter": {
      "Name": "Portrait Filter",
      "Version": "1.1",

      "Description": "Provides a depth-of-field (bokeh) effect on images. Great for selfies.",
      "Platforms": [ "windows" ],
      "License": "MIT",
      "LicenseUrl": "https://opensource.org/licenses/MIT",

      // Launch instructions
      "AutoStart": true,
      "FilePath": "PortraitFilter.exe",
      "Runtime": "execute",

      // Which server version is compatible with each version of this module.
      "ModuleReleases": [
        { "ModuleVersion": "1.1", "ServerVersionRange": [ "2.1", "" ], "ReleaseDate": "2023-03-20" }
      ],

      "RouteMaps": [
        {
          "Name": "Portrait Filter",
          "Path": "image/portraitfilter",
          "Command": "filter",
          "Description": "Blurs the background behind people in an image.",
          "Inputs": [
            {
              "Name": "image",
              "Type": "File",
              "Description": "The image to be filtered."
            },
            {
              "Name": "strength",
              "Type": "Float",
              "Description": "How much to blur the background 0.0 - 1.0.",
              "DefaultValue": "0.5"
            }
          ],
          "Outputs": [
            {
              "Name": "success",
              "Type": "Boolean",
              "Description": "True if successful."
            },
            {
              "Name": "filtered_image",
              "Type": "Base64ImageData",
              "Description": "The filtered image."
            }
          ]
        }
      ]
    }
  }
}
modulesettings.development.json file that overrides the
FilePath value when run in Debug.
This file overrides some of the modulesettings.json file values for the Development environment. In this case, the location of the executable will be found in the bin\debug\net6.0 directory rather than the Module's root folder, so we force the working directory to be the directory of the module, and update the location of the file to execute, relative to the module's folder.
{
    "Modules": {
        "PortraitFilter": {
           "FilePath": "bin\\debug\\net7.0\\SentimentAnalysis.exe"
        }
    }
}
Create the Background Worker
The next step is to create the Background Worker. This will poll the CodeProject.AI Server for commands, process any commands it finds, and return the result to the CodeProject.AI Server.
The Worker will use the CodeProject.AI .NET SDK to communicate with the CodeProject.AI Server and process the request and response values. Add a Project Reference to the CodeProject.AI.SDK project. This is a preliminary implementation and will change in the future, mainly to add features, so this code will require minimal changes going forward.
Add required references
In addition, we will be using the SkiaSharp library to provide cross platform graphics support as well as support for images not supported by the Windows System.Drawing library. Add the following NuGet packages to the project:
SkiaSharp.Views.Desktop.Commonto include the SkiaSharp core and interoperability with System.Drawing.SkiaSharp.NativeAssets.Linuxto provide support when running under Linux.
Create the PortraitFilter Worker
Open the Worker.cs file and to the following:
- rename the class to PortraitFilterWorker. The file should now look like
namespace CodeProject.AI.Modules.PortraitFilter
{
    public class PortraitFilterWorker : ModuleWorkerBase
    {
        private readonly ILogger<PortraitFilterWorker> _logger;

        /// <summary>
        /// Initializes a new instance of the PortraitFilterWorker.
        /// </summary>
        /// <param name="logger">The Logger.</param>
        /// <param name="deepPersonLab">The deep Person Lab.</param>
        /// <param name="configuration">The app configuration values.</param>
        public PortraitFilterWorker(ILogger<PortraitFilterWorker> logger,
                                    IConfiguration configuration)
            : base(logger, configuration)
        {

        public override BackendResponseBase ProcessRequest(BackendRequest request)
        {
        }
    }
}
- Ensure that the
Program.csfile has also been updated
using CodeProject.AI.Modules.PortraitFilter;

IHost host = Host.CreateDefaultBuilder(args)
    .ConfigureServices(services =>
    {
        services.AddHostedService<PortraitFilterWorker>();
    })
    .Build();

await host.RunAsync();
- Add the following using statements at the top of the file to reference the libraries and projects this class needs.
using System.Drawing;
using CodeProject.AI.SDK;

using Microsoft.ML.OnnxRuntime;

using SkiaSharp;
using SkiaSharp.Views.Desktop;
- At the top of the namespace add a definition for the response that will be returned to the
CodeProject.AI Server. The BackendSuccessResponse base class is defined in the SDK and provides the boolean "success" property. The JSON serializer will encode the byte[] filtered_image value to Base64.
namespace CodeProject.AI.Modules.PortraitFilter
{
    class PortraitResponse : BackendSuccessResponse
    {
        public byte[]? filtered_image { get; set; }
    }
- Next, we will derive our class from the SDK's
ModuleWorkerBaseclass and add some fields that will be use in the class._modelPathwhich defines the location of the ONNX model._defaultQueueNamewhich identifies the default queue from which this module will pull its requests. Used only if it's not passed in by the server._defaultModuleIdwhich is a default unique identifier for this module._moduleNamewhich is a default name for this module._deepPersonLabwhich will hold a reference to the code we imported from thePortrait Moderepo.
public class PortraitFilterWorker : ModuleWorkerBase
{
    private const string _modelPath = "Lib\\deeplabv3_mnv2_pascal_train_aug.onnx";
    private DeepPersonLab? _deepPersonLab;
- Create the class constructor to initialize the fields. Note that when creating the
DeepPersonLabinstance, the_modulePathhas the directory separator characters adjusted for the platform on which we are running. The GetSessionOptions method provides an opportunity to setup GPU support for the module. This is outside of the scope of this article for now.
public PortraitFilterWorker(ILogger<PortraitFilterWorker> logger,
                            IConfiguration configuration)
    : base(logger, configuration, _moduleName, _defaultQueueName, _defaultModuleId)
{
    string modelPath = _modelPath.Replace('\\', Path.DirectorySeparatorChar);

    // if the support is not available for the Execution Provider DeepPersonLab will throw
    // So we try, then fall back
    try
    {
        var sessionOptions = GetSessionOptions();
        _deepPersonLab = new DeepPersonLab(modelPath, sessionOptions);
    }
    catch
    {
        // use the defaults
        _deepPersonLab = new DeepPersonLab(modelPath);
        ExecutionProvider = "CPU";
        HardwareType      = "CPU";
    }
}

private SessionOptions GetSessionOptions()
{
    var sessionOpts = new SessionOptions();

    // add GPU support here if you wish

    sessionOpts.AppendExecutionProvider_CPU();
    return sessionOpts;
}

// Override if you have updated graphics hardware to report to the server
protected override void GetHardwareInfo()
{
}
-
When the
PortraitFilterWorkeris run, theProcessRequestmethod will be called each time a request is placed on the queue for this module. OurProcessRequestmethod will process this request, and return the results. The server will handle the communication back to the client.Replace the existing
ExecuteAsyncmethod with
public override BackendResponseBase ProcessRequest(BackendRequest request)
{
    if (_deepPersonLab == null)
        return new BackendErrorResponse(-1, $"{ModuleName} missing _deepPersonLab object.");

    // ignoring the file name
    var file        = request.payload?.files?.FirstOrDefault();
    var strengthStr = request.payload?.values?
                                        .FirstOrDefault(x => x.Key == "strength")
                                        .Value?[0] ?? "0.5";

    if (!float.TryParse(strengthStr, out var strength))
        strength = 0.5f;

    if (file?.data is null)
        return new BackendErrorResponse(-1, "Portrait Filter File or file data is null.");

    Logger.LogInformation($"Processing {file.filename}");

    // dummy result
    byte[]? result = null;

    try
    {
        var portraitModeFilter = new PortraitModeFilter(strength);

        byte[]? imageData = file.data;
        Bitmap? image     = GetImage(imageData);

        if (image is null)
            return new BackendErrorResponse("Portrait Filter unable to get image from file data.");

        Stopwatch stopWatch = Stopwatch.StartNew();
        Bitmap mask = _deepPersonLab.Fit(image);
        stopWatch.Stop();

        if (mask is not null)
        {
            Bitmap? filteredImage = portraitModeFilter.Apply(image, mask);
            result = ImageToByteArray(filteredImage);
        }
    }
    catch (Exception ex)
    {
        return new BackendErrorResponse($"Portrait Filter Error for {file.filename}: {ex.Message}.");
    }

    if (result is null)
        return new BackendErrorResponse("Portrait Filter returned null.");

    return new PortraitResponse {
        filtered_image = result,
        inferenceMs    = sw.ElapsedMilliseconds
    };
}
- Additionally we need to add a few methods to the end of the class to
- output to the log when the worker shuts down.
- create a Bitmap from the request data
- convert an Image to a byte[]
// Using SkiaSharp as it handles more formats.
private static Bitmap? GetImage(byte[] imageData)
{
    if (imageData == null)
        return null;

    var skiaImage = SKImage.FromEncodedData(imageData);
    if (skiaImage is null)
        return null;

    return skiaImage.ToBitmap();
}

public static byte[]? ImageToByteArray(Image img)
{
    if (img is null)
        return null;

    using var stream = new MemoryStream();

    // See https://github.com/dotnet/designs/blob/main/accepted/2021/system-drawing-win-only/system-drawing-win-only.md
#pragma warning disable CA1416 // Validate platform compatibility
    img.Save(stream, System.Drawing.Imaging.ImageFormat.Png);
#pragma warning restore CA1416 // Validate platform compatibility

    return stream.ToArray();
}
That's all the code that is needed to get a fully functional AI Module created for CodeProject.AI Server. This code is included in the public https://github.com/codeproject/CodeProject.AI-Server GitHub repo.
Testing with the Debugger
When you run the CodeProject.AI Server in the debugger, the Server will detect the module because:
- it is in a subdirectory of src\AnalysisLayer
- it has a modulesettings.json file
The Server will start all the modules it finds and have AutoStart=true in the configuration. The Dashboard will start and after a few seconds you should see

Running on Linux
The module uses System.Drawing objects and methods
As of NET 6, System.Drawing is not officially supported on non-Windows platforms as documented in https://docs.microsoft.com/en-us/dotnet/core/compatibility/core-libraries/6.0/system-drawing-common-windows-only. Running on Linux can enabled by creating a runtimeconfig.json file with the following contents
Also SkiaSharp has dependencies on a couple of libraries that may not be installed by default on you Linux installation. if you get the errorSystem.TypeInitializationException: The type initializer for 'SkiaSharp.SKAbstractManagedStream' threw an exception. ---> System.DllNotFoundException: Unable to load shared library 'libSkiaSharp' or one of its dependencies.
Then you need to install the missing dependencies
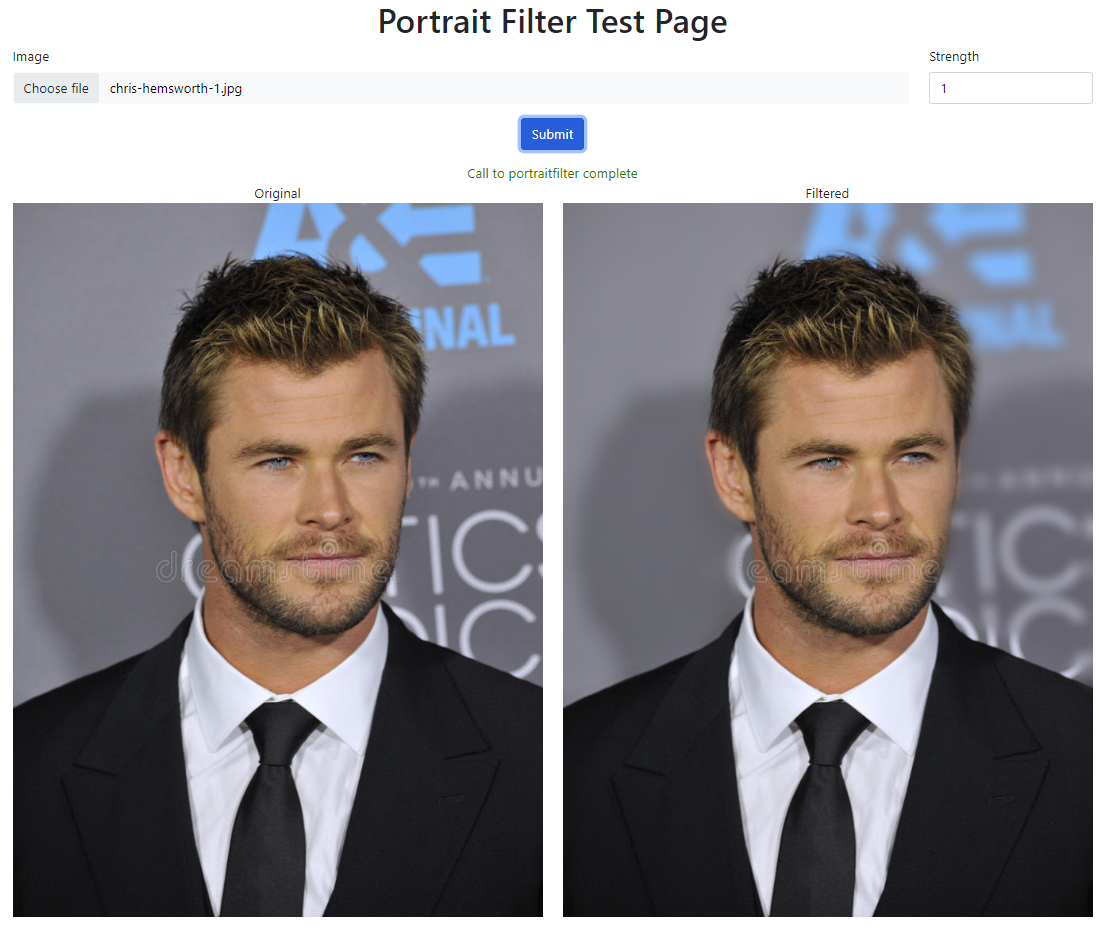
Create a test.html file.
While this module is currently included in the install as of v1.3.0 with support in the CodeProject.AI Playground page, for new modules you would create a simple test page to send a request to the CodeProject.AI Server and display the response.
I have include one such file, test.html, in the project. I displays a simple form the allows the user to select an image, set the blur strength and submit the form. The returned response is displayed. It include all the JavaScript code required to send the form to the Server and display the Base64 encoded image response. This is listed below.
Just start the Server in the debugger and open the test.html file.
<!DOCTYPE html>

<html lang="en" xmlns="http://www.w3.org/1999/xhtml">
<head>
    <!-- Required meta tags -->
    <meta charset="utf-8">
    <meta name="viewport" content="width=device-width, initial-scale=1">

    <title>Portrait Filter Test Page</title>

    <!-- Bootstrap 5 CSS only -->
    <link href="https://cdn.jsdelivr.net/npm/bootstrap@5.1.3/dist/css/bootstrap.min.css" rel="stylesheet"
          integrity="sha384-1BmE4kWBq78iYhFldvKuhfTAU6auU8tT94WrHftjDbrCEXSU1oBoqyl2QvZ6jIW3"
          crossorigin="anonymous">
    <script type="text/javascript">
        const apiServiceUrl = "http://localhost:32168";

        function setStatus(text, color) {
            if (color)
                document.getElementById("status").innerHTML = "<span style='color:" + color + "'>" + text + "</span>";
            else
                document.getElementById("status").innerHTML = "<span>" + text + "</span>";
        }

        function submitRequest(controller, apiName, images, parameters, doneFunc) {

            setStatus("Sending request to AI server", "blue");

            var formData = new FormData();

            // Check file selected or not
            if (images && images.length > 0) {
                for (var i = 0; i < images.length; i++) {
                    file = images[i];
                    formData.append('image' + (i + 1), file);
                }
            }

            if (parameters && parameters.length > 0) {
                for (var i = 0; i < parameters.length; i++) {
                    keypair = parameters[i];
                    formData.append(keypair[0], keypair[1]);
                }
            }

            var url = apiServiceUrl + '/v1/' + controller + '/' + apiName;

            //result.innerHTML = "";

            fetch(url, {
                method: "POST",
                body: formData
            })
                .then(response => {
                    if (!response.ok)
                        setStatus('Error contacting API server', "red");
                    else {
                        response.json().then(data => {
                            if (data) {
                                doneFunc(data)
                                setStatus("Call to " + apiName + " complete", "green");
                            } else
                                setStatus('No data was returned', "red");
                        })
                            .catch(error => {
                                setStatus("Unable to read response: " + error, "red");
                            })
                    }
                })
                .catch(error => {
                    setStatus('Unable to complete API call: ' + error, "red")
                });
        }

        function onSubmit(image, strength) {
            if (image.files.length == 0) {
                alert("No file was selected for scene detection");
                return;
            }

            var images = [image.files[0]];
            filteredImage.src = "";

            submitRequest("image", "portraitfilter", images, [["strength", strength.value]], function (data) {
                // alert("got response");
                filteredImage.src = "data:image/png;base64," + data.filtered_image;
            });
        }

        function onFileSelect(image) {
            if (image.files.length == 0) {
                originalImage.src = "";
                return;
            }

            originalImage.src = URL.createObjectURL(image.files[0]);
            filteredImage.src = "";
        }

        function onStrengthChange() {
            filteredImage.src = "";
        }
    </script>

</head>
<body>
    <div class="container">
        <h1 class="text-center">Portrait Filter Test Page</h1>
        <form method="post" action="" enctype="multipart/form-data" id="myform">
            <div class="row">
                <div class="mb-3 col">
                    <label class="form-label">Image</label>
                    <input class="form-control btn-light" id="image" type="file" onchange="onFileSelect(image)" />
                </div>
                <div class="mb-3 col-2">
                    <label class="form-label">Strength</label>
                    <input class="form-control" id="strength" type="number" min="0.0" max="1.0" step="0.1" value="0.5"
                           onchange="onStrengthChange()"/>
                </div>
            </div>
            <div class="row">
                <div class="mb-3 text-center">
                    <input class="btn btn-primary" type="button" value="Submit" onclick="onSubmit(image, strength)" />
                </div>
            </div>
        </form>
        <div id="status" class="text-center"></div>

        <div class="row">
            <label id="originallbl" class="col-6 text-center">Original</label>
            <label id="filteredlbl" class="col-6 text-center">Filtered</label>
        </div>
        <div class="row">
            <img id="originalImage" class="col-6" />
            <img id="filteredImage" class="col-6" />
        </div>
    </div>
    <!-- Bootstrap 5 JavaScript Bundle with Popper -->
    <script src="https://cdn.jsdelivr.net/npm/bootstrap@5.1.3/dist/js/bootstrap.bundle.min.js"
            integrity="sha384-ka7Sk0Gln4gmtz2MlQnikT1wXgYsOg+OMhuP+IlRH9sENBO0LRn5q+8nbTov4+1p"
            crossorigin="anonymous"></script>
</body>
</html>
Added Bonus - Bin deploy Module on Windows.
NET 6 modules do not depend on the installation of any runtimes or the setup of virtual environments the same way Python modules are. The NET 6 runtime is already installed by the CodeProject.AI Server installer. Because of this, the Release version of the build can be bin deployed into an existing Windows installation of the CodeProject.AI Server. The steps to do this are:
- Build the module project in
Releasemode. - Create a folder in the
c:\Program Files\CodeProject\eAI\AnalysisLayerdirectory. This directory should have the same name as the FilePath's directory in themodulesettings.jsonfile. For this example that would be "PortraitFilter". - Copy the contents of the project's bin\Release\net6.0 directory to the directory created in the previous step.
- Using the
Serviceapp, restart the CodeProject.AI Server service. The new module will now be expose on the endpoint defined in the modulesettings.json file.