Overview
A content type is a reusable collection of settings you want to apply to a certain category of content. Content types enable you to describe and categorize your items in a more significant way. Use content types to define and manage the metadata and behaviors of your documents and list items in a centralized, reusable way. Content types also enable you to store different types of content in the same document libraries and lists. Each content type can specify: Properties to associate with items of its type, Workflows that can be launched from items of its type, Information management policies to associate with items of its type, Document templates (for document content types), Document conversions to make available (for document content types), Document conversions to make available (for document content types), Custom features and You can associate a content type with a list or library.
Applies To
MOSS 2007, WSS 3.0, InfoPath and other Microsoft office tools
Content
- Enable Content Type in Document Library
- Remove the Default Content Type
- Adding your Custom Template as Site Content Type
- Adding InfoPath Form as Content Type
Enable Content Type in Document Library
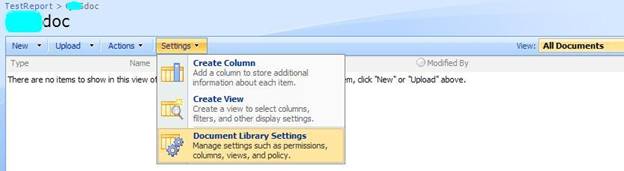
Open your document library which you created for adding the content type and click on the settings and select the Document Library Settings
Now select the advanced settings under the general settings and proceed to next operation.

In the content type section set allow management of content types to Yes. Leave the other options and settings as it is, in case you need a change a as per your requirement go ahead.
Now click ok to continue and proceed to next level of configuration.
Now you see the new section called content types as been visible now. Click on the document content type which is the default content type enabled for our document library.
Remove the Default Content Type
Here you can find the list of settings options available for selected content type.
Select Delete option under the setting, to delete the existing default content type. The message will prompt, select ok to confirm.
Adding your Custom Template as Site Content Type
Now go to your site actions and site settings to add your custom content type in the site content type list.
Click on the Site content types under galleries to continue to add the custom content type.
Click on create to add your own content type in the custom content type list.
This is the wizard screen to create the new content type. First enter your own desired name for your content type.
In this drop down choose the parent content type, corresponding content types will be displayed in the next drop down.
Now this your content type, which shown with some options to work on that is listed below
Now select the Advanced settings and continue to work on your content type.
In the Document Template choose the radio button upload a new document template, browse and select your document content type and if you want to set it in read only mode set it to yes in the read only option.
Click ok and continue. Now go to your document library and click on settings select document library settings, under content types click on the Add from existing site content types to continue.
You can see the “custom” the content type group which created was listed in the dropdown under the select the content types
Our content type is added click ok to continue.
Our content type is listed under the content type list of our document library.
Now check in the document library the content type is successfully added for the document library.
Adding InfoPath Form as Content Type
Now we can how InfoPath forms can be added as content type in the SharePoint site.
Select Microsoft Office InfoPath in the dropdown and click ok to continue. To change the default .xsn InfoPath template click on the advanced settings
Now upload the new .xsn template to the content type to change default.
Now your InfoPath content type as successfully added
Reference
- MSDN Microsoft
- Technet Microsoft
This member has not yet provided a Biography. Assume it's interesting and varied, and probably something to do with programming.


